This form is being designed to keep a watch on the high-value transactions done by the taxpayers. The Income Tax Act has formulated the new concept of furnishing a Statement of Financial transactions in a prescribed form 61 A which was previously known as Annual Information Return.
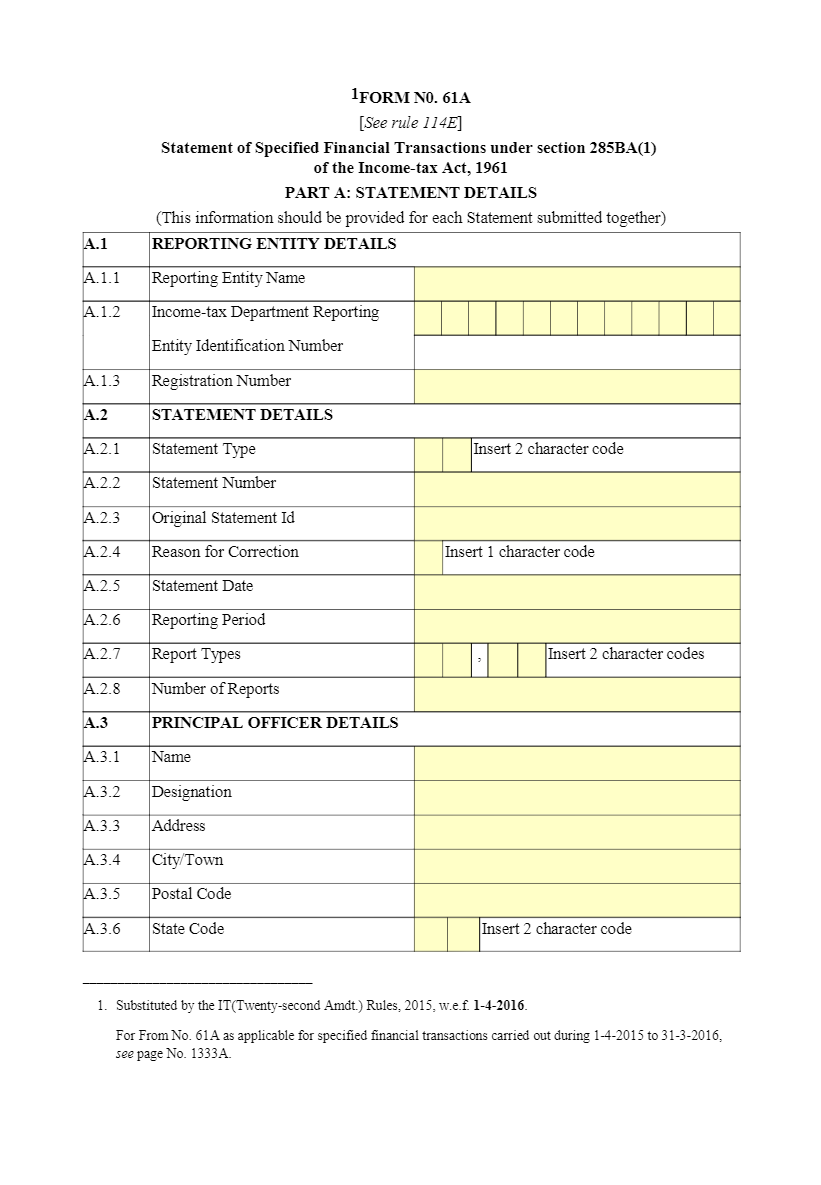
It is a must to keep in mind that the Central Board of Direct Taxes (CBDT) recommend different values concerning various transactions. The aggregate value of a particular financial year must be Rs 50,000.
The statement of the previous financial year needs to be furnished by 31st May of every year. In case an assessee fails to do so, then Income Tax Authorities would issue a notice to an assessee regarding submission of Form 61 within 30 days. Even after giving notice, the assessee in default not replying to such notice, a penalty would be levied on assessee amount to INR 500/ a day. Penalty will be calculated starting from the expiry of the stipulated period.
| Individuals responsible for furnishing Form 61 A | Type of transaction and limit |
| Banking companies and Cooperative Bank | Cash payment related to Purchase orders, Demand Drafts for an amount totaling INR 10 Lakhs or more on an annual basis. |
| Banking companies and Cooperative Banks | All cash payments which were exceeding INR 10 Lakhs for purchasing any prepaid RBI instruments like RBI bonds. |
| Banking companies and Cooperative Banks | All withdrawals and deposits amounting to 50 Lakhs or more from a current account of an account holder. |
| Banking companies, Co-operative banks, and Post offices | Total deposit of INR 10 Lakh or more in or more accounts of an account holder. |
| Company or institution which deals in issuing of bonds and debentures | Receipt exceeding INR 10 Lakhs in a year from an individual for acquiring such debentures and bonds. |
| Company issuing shares | Receipt Exceeding INR 10 Lakhs in a year from an individual for acquiring of shares. It includes share application money received. |
| Listed Companies | Share buy-back from a person or amount totaling INR10 Lakh or more. |
| Dealer of a Foreign Exchange | Receipt from a person for a sale of Foreign currency or expenses incurred in such Foreign Currency using a Credit Card or a Debit Card or demand draft or traveler’s cheque of INR 10 Lakh or more annually. |
| Inspector General/sub-registrar appointed under Registration act, 1908 | Purchase or a sale of immovable property worth INR 30 Lakhs or more annually. |
| Persons liable for audit u/s 44AB of the Income Tax Act | All Cash receipts which are exceeding INR 2 Lakhs by a person for sale or purchase of goods and services. |
Step 1
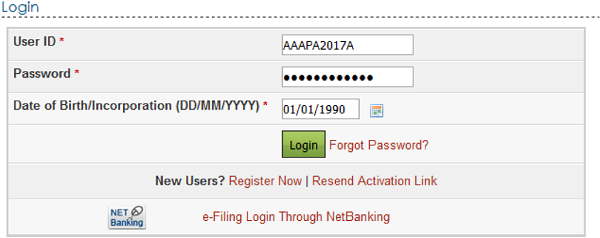
Login to e-Filing portal using the User ID, e-Filing Password and DOB/DOI.
STEP 2
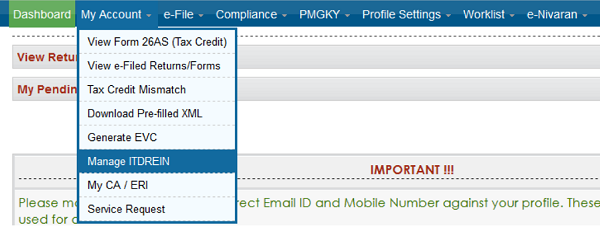
Go to My Account → Manage ITDREIN.
STEP 3
To generate new ITDREIN click on the button “Generate New ITDREIN”.

Step 4
A Pop up with Form Type and Reporting Entity Category is displayed. Select the Form Type and Reporting Entity Category from the dropdown.

Step 5
Based on the Form Type and Reporting Entity Category selected, the ITDREIN will be generated and the user will be able to upload and view the corresponding Form.
Step 6
Click Generate ITDREIN button
Step 7
Success Message is displayed as shown below. The user receives a confirmation e-mail on the successful generation of ITDREIN to the registered Email ID. An SMS is also sent to the registered mobile number.

Step 8
On Successful Generation of ITDREIN, the screen is displayed as shown

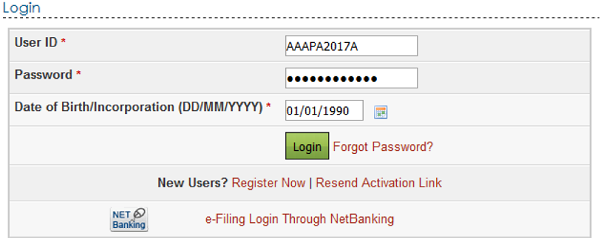
Step 1 – Login to e-Filing portal using the User ID, e-Filing Password and DOB.
Step 2:Go to “My Account’’- Manage ITDREIN
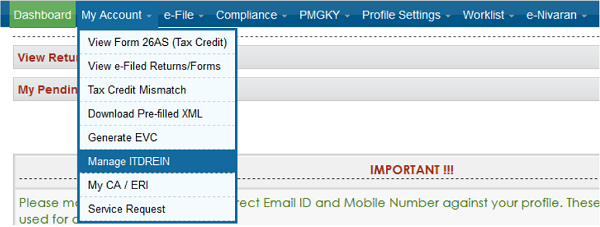
Step 3:To add Authorized Person for the generated ITDREIN, click on the link provided in the ITDREIN Column.

Step 4: Click on the button Add Authorized Person.

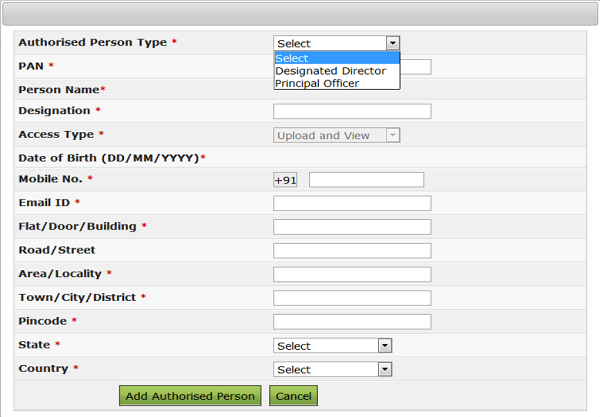
Step 5: A Pop up with Authorized Person details appears as shown below.
Note:
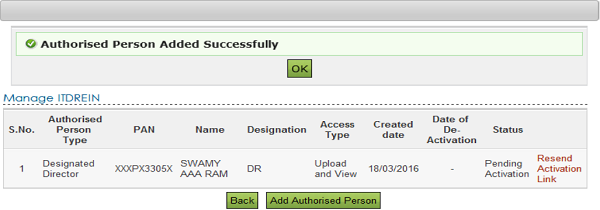
Step 6: Enter all the details and Click on Add Authorized Person button. Success Message is displayed as shown below
Step 7: The user receives a confirmation e-mail on the successful Addition of Authorized Person to the registered email address. An SMS is also sent to the registered mobile number.
Step 8: The Authorized Person receives a confirmation e-mail with an activation link to the Authorized Person’s Email ID. An SMS along with OTP (One-time Password) is sent to the Authorized Person’s Mobile Number.
To activate the account, the user should click on the Activation link, enter the Mobile PIN, Password and Confirm Password and click on Activate Button. On success, the user account is activated, and the database is updated.
Step 09: After the Authorized person is activated, the Authorized person can view the details as below.

Step 1: Login to the e-Filing portal using User ID (ITDREIN), Authorized Person PAN, and Password.

Step 2: Go to e-File → Upload Form 61A

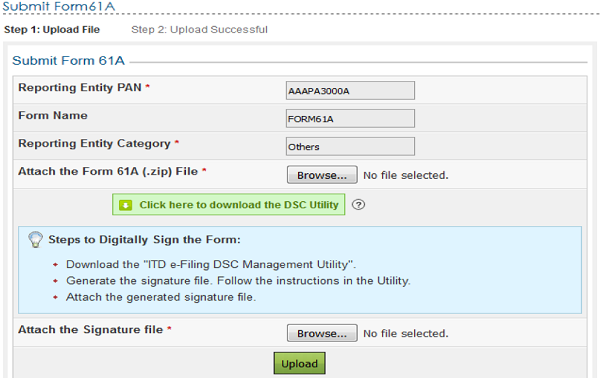
Step 3: The upload screen will have the below details.
Attach the Form 61A (.zip) File along with the Signature file and click on “Upload”.
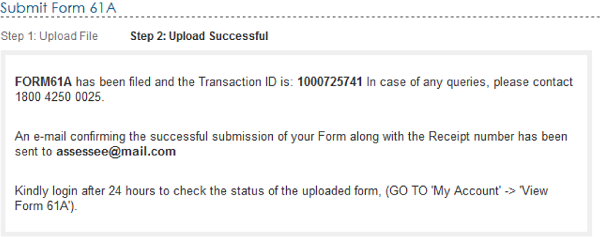
Step 4: On successful validation, a successful message will be displayed as follows:
Step 1 – Login to the e-Filing portal using User ID (ITDREIN), Authorized Person PAN, and Password.

Step 2: Go to ‘My Account’ à View Form 61A.

Step 3: The user will select the Assessment Year, Filing Status and click on “View Details”

Step 4: The filing status will have the following details:


Step 6: After the processing of the uploaded form, then the Filing status shall be updated based on the validation done on the uploaded file and displayed as Accepted/Rejected. When the status is “Accepted” then the following screen is displayed to the user.

Step 7: If the status is “Rejected” then the following screen is displayed to the user.

Step 8:By clicking on “Transaction No”, the below details shall be displayed. The uploaded file can be downloaded by clicking on the link “ZIP”.
